What is Pelican
Pelican is a static site generator written in Python language. The website content can be written using Markdown markup or ReStructuredText markup.
No particular html knowledge is required.
Installation
There are many ways to install Pelican. You can follow the explanations on the main website: Installing Pelican.
Call pelican-quickstart and answer all the questions:
Welcome to pelican-quickstart v3.7.1.

This script will help you create a new Pelican-based website.

Please answer the following questions so this script can generate the files
needed by Pelican.


> Where do you want to create your new web site? [.]
> What will be the title of this web site? pelican_demo
> Who will be the author of this web site? Pascal Geiser
> What will be the default language of this web site? [English]
> Do you want to specify a URL prefix? e.g., http://example.com   (Y/n)
> What is your URL prefix? (see above example; no trailing slash) https://pgeiser.gitlab.io/pelican_demo
> Do you want to enable article pagination? (Y/n)
> How many articles per page do you want? [10]
> What is your time zone? [Europe/Paris]
> Do you want to generate a Fabfile/Makefile to automate generation and publishing? (Y/n) N
> Do you want an auto-reload & simpleHTTP script to assist with theme and site development? (Y/n) N
Done. Your new project is available at <your folder>
Running pelican on the created folder will lead to this message:
$ pelican
WARNING: No valid files found in content.
Done: Processed 0 articles, 0 drafts, 0 pages and 0 hidden pages in 0.10 seconds.
Jump into the freshly created output directory and run a simple python server:
$ cd output
$ python -m SimpleHTTPServer
Serving HTTP on 0.0.0.0 port 8000 ...
Open a browser and go to http://localhost:8000/
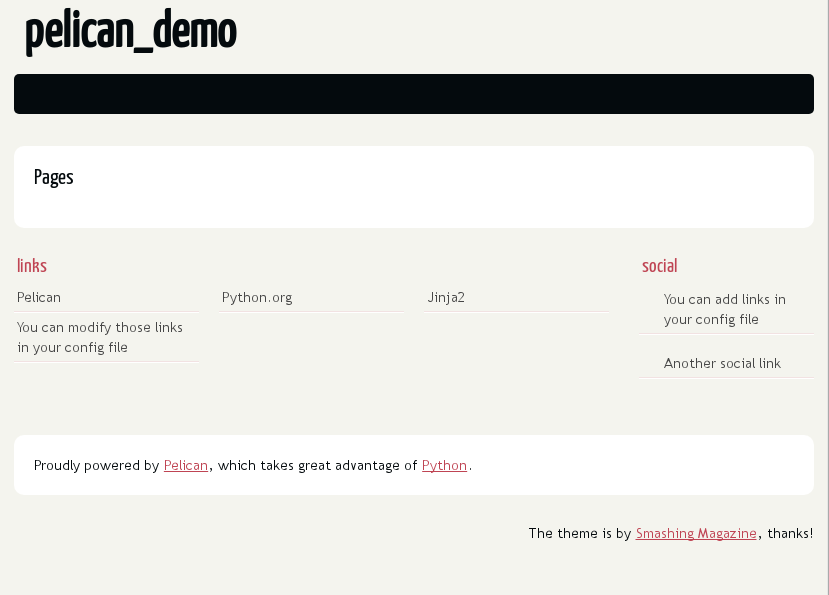
That’s what you should get:
Creating some content
Create a file content/posts/category/first.rst:
First post
##########

:date: 2017-11-25 19:00
:modified: 2017-11-25 19:00
:tags: pelican, web
:authors: Your name here!
:summary: First post with pelican

Pelican rocks!
Edit pelicanconf.py and add:
ARTICLE_PATHS = ['posts']
USE_FOLDER_AS_CATEGORY = True
The final file structure is the following:
site
│   pelicanconf.py
│   publishconf.py
│
└───content
    └───posts
        └───category
                first.rst
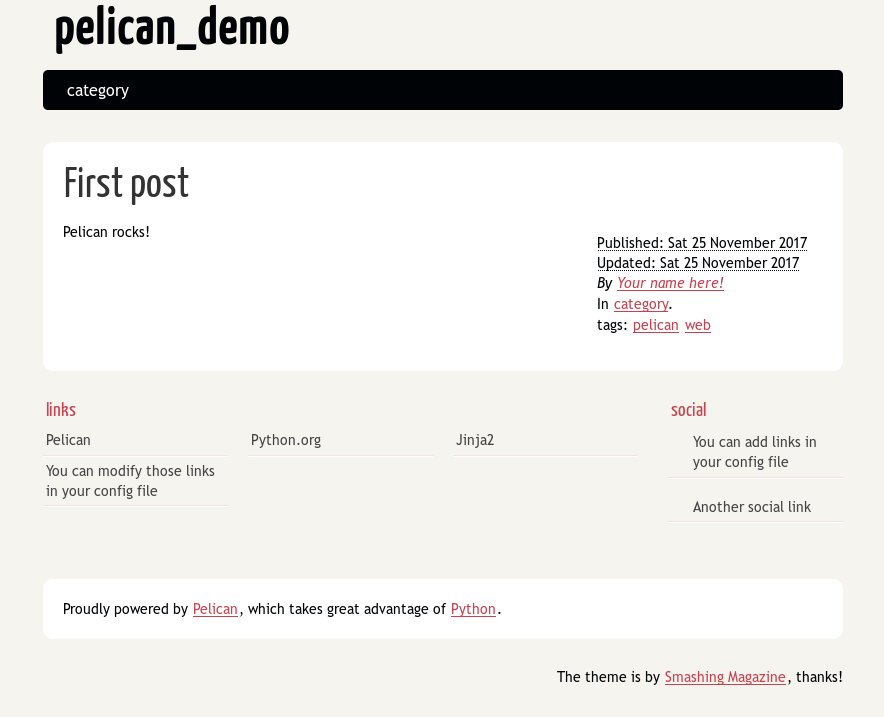
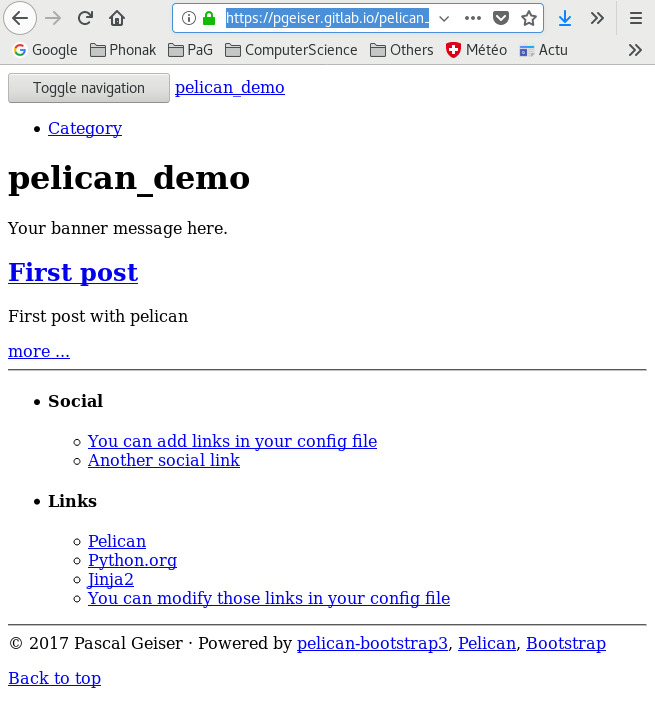
The final result should look like this:
Theme pelican-bootstrap3
I’ve chosen the theme pelican-bootstrap3. It’s up to date and supports a lot of extra features. To install it, clone the repository:
$ git clone https://github.com/getpelican/pelican-themes.git
Cloning into 'pelican-themes'...
remote: Counting objects: 5816, done.
remote: Compressing objects: 100% (5/5), done.
remote: Total 5816 (delta 0), reused 0 (delta 0), pack-reused 5811
Receiving objects: 100% (5816/5816), 29.91 MiB | 292.00 KiB/s, done.
Resolving deltas: 100% (2870/2870), done.
Checking connectivity... done.
Checking out files: 100% (2037/2037), done.
Now copy the folder pelican-themes/pelican-bootstrap3 in your pelican website directory.
Clone the Pelican plugins:
$ git clone https://github.com/getpelican/pelican-plugins.git
Cloning into 'pelican-plugins'...
remote: Counting objects: 4316, done.
remote: Compressing objects: 100% (9/9), done.
remote: Total 4316 (delta 1), reused 0 (delta 0), pack-reused 4306
Receiving objects: 100% (4316/4316), 2.40 MiB | 306.00 KiB/s, done.
Resolving deltas: 100% (2010/2010), done.
Checking connectivity... done.
Copy the folder pelican-pluginsi18n_subsites in a plugins subdirectory.
Create a banner picture and put in ‘content/images/banner.jpg’
Edit the file pelicanconf.py and add the following lines:
# THEME CONFIG
THEME = 'pelican-bootstrap3'
JINJA_ENVIRONMENT = {'extensions': ['jinja2.ext.i18n']}
PLUGIN_PATHS = ['plugins']
PLUGINS = ['i18n_subsites']
BANNER = 'images/banner.jpg'
BANNER_SUBTITLE = "Your banner message here."
STATIC_PATHS = ['images']
The final file structure is the following:
site
│   pelicanconf.py
│   publishconf.py
│
├───content
│   ├───images
│   │       banner.jpg
│   │
│   └───posts
│       └───category
│               first.rst
│
├───pelican-bootstrap3
│   ├───...
│
└───plugins
    └───i18n_subsites
        ├───...
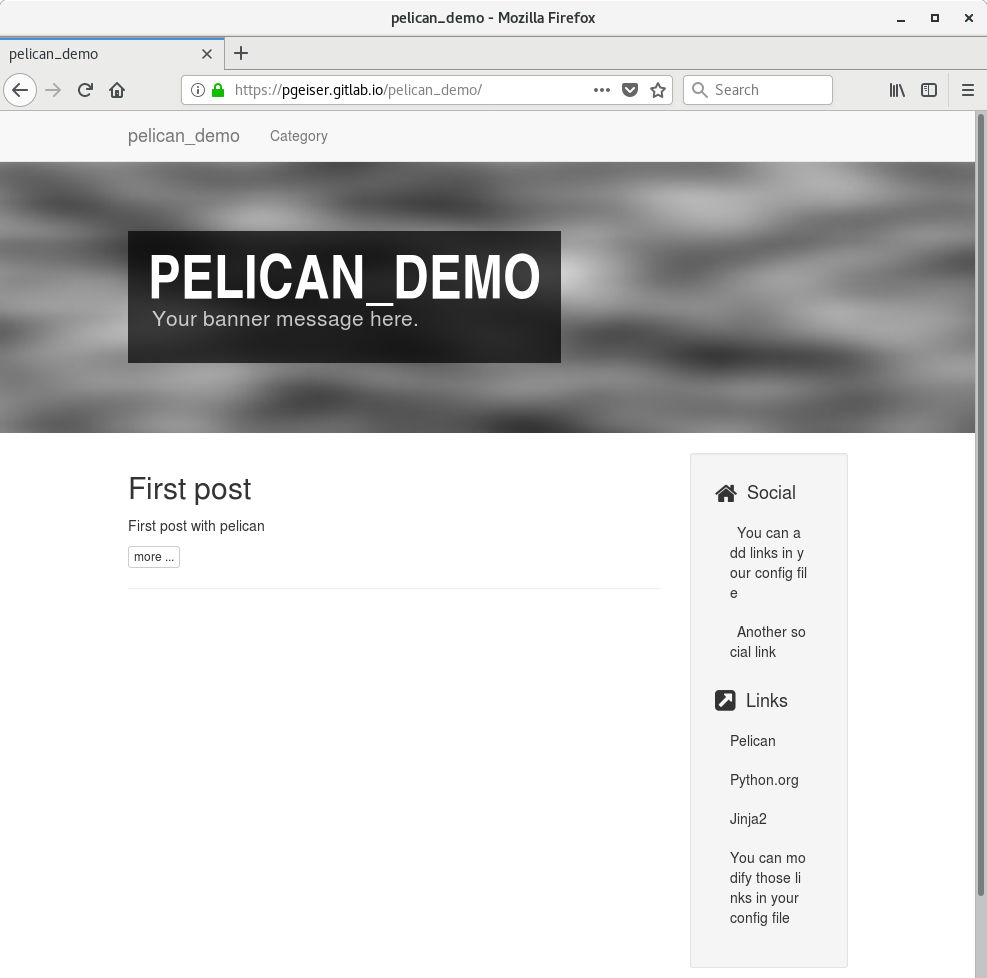
And the result:

Deploying on Gitlab pages
Deploying on Gitlab pages is well explained in details in the Gitlab documentation:
To export a simple folder containing html, you need to create a file .gitlab-ci.yml with the following content:
pages:
  stage: deploy
  script:
  - echo 'Nothing to do...'
  artifacts:
    paths:
    - public
  only:
  - master
and make sure the content is in a folder called public. After each commit, a continuous integration pipeline will be executed to export your pages on the Gitlab pages:
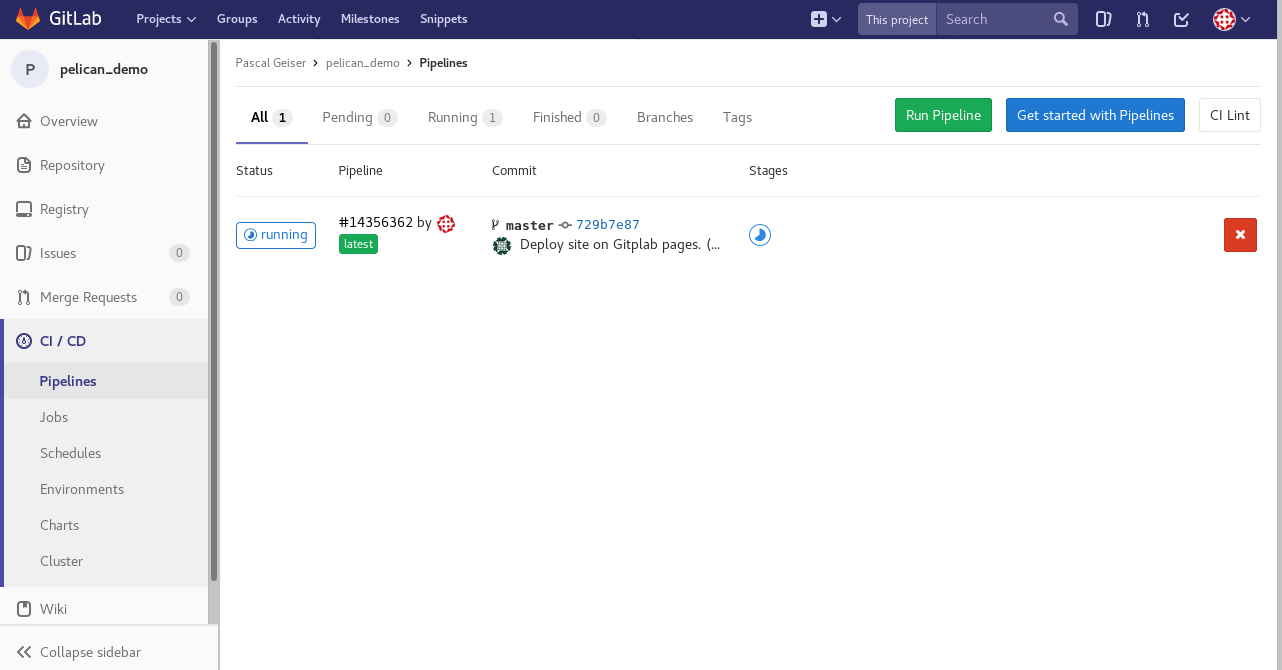
You can look at the job (even while being executed):
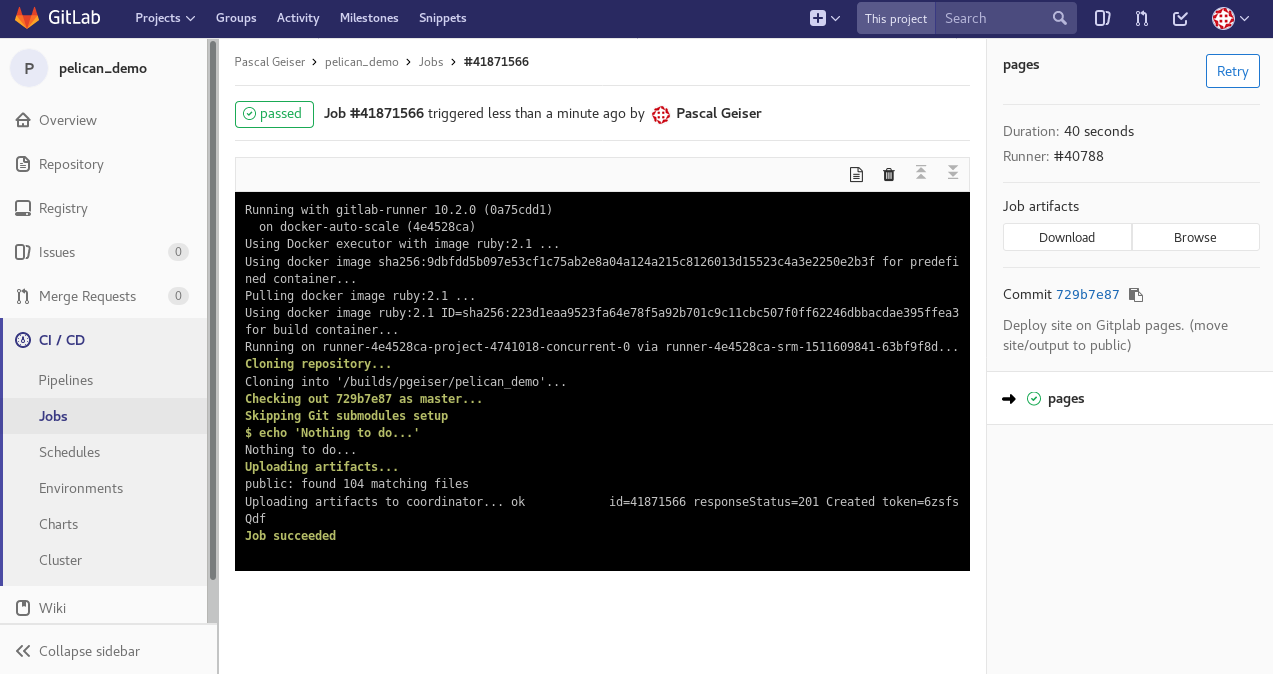
if everything went correctly, you should be able to admire the result on Gitlab pages. In my case: https://pgeiser.gitlab.io/pelican_demo
But wait… This is not the result we were expecting. In fact, by default, pelican uses relative paths which are easy to use with the python SimpleHTTPServer. For Gitlab pages, you have to use absolute urls. By rebuild using the correct configuration (publishconf.py) and commiting the results, finally the site appeas as expected:
Have fun!